Skip to content
International Shipping
Wish Lists Cart
0 items

#20 Secured Entrance Project With PicoBricks

07 Nov 2023
#20 Secured Entrance Project With PicoBricks

Security systems include technologies that can control access at building and room entrances. Card entry systems, in which only authorized personnel can enter the operating rooms of hospitals, are one of the first examples that come to mind. In addition, many entrance areas are equipped with card and password entry technologies. These electronic systems not only prevent the entrance of unauthorized persons, but also ensure that entry and exit information is recorded. Password entry, card entry, fingerprint scanning, face scanning, retina scanning and voice recognition technologies are the authentication methods used in electronic entry systems.

Systems such as RFID and NFC are the basic forms of contactless payment technologies today. Although the contactless payment technology used with credit cards is technically different, the working logic is the same. The maximum distance between the reader and the card is one of the features that distinguishes the technologies from each other. When leaving the shopping stores, especially clothing stores, NFC tags on the products will beep if they are detected by the readers at the entrance. A kind of RFID technology is used in those systems.

In this project, we will prepare a card entry system on a model house. The electronic components we will use are MFRC522 RFID reader and 13.56 Mhz cards.

Details and Algorithm

Place the MFRC522 reader near the door of the model so that it is visible from the outside. Place the RGB LED and the buzzer on the wall where the door is visible from the outside. Picoboard can remain in the model. The entrance door of the model should be connected to the door of the servo, while the servo is set to 0 degrees, the door should be closed. You should determine the serial number of the RFID / NFC tag that will open the door, create the homeowner variable and assign the serial number to this variable.

Set the door to the closed position when the program starts. Make the buzzer beep when a card is shown to the RFID reader. If the serial number of the card being read matches the serial number in the homeowner variable, turn the RGB LED on green. Then let the door open. Make sure the door is closed 3 seconds after the door is opened. If the serial number of the card being read does not match the homeowner variable, turn the RGB LED on red and play a different tone from the buzzer.

Components

1X PicoBricks
1X Servo Motor
1X RC522-RFID Card
Jumper Cables
Easy Connection Cables

Wiring Diagram

You can code and run Picobricks’ modules without wiring. If you are going to use the modules by separating them from the board, you should make the module connections with grove cables.

Construction Stages of the Project

We will make the project on the house model you used in the Smart Home project number 18.

Click for Smart Home project

Drill holes for the RGB LED, Buzzer and RC522 RFID reader on the house model.

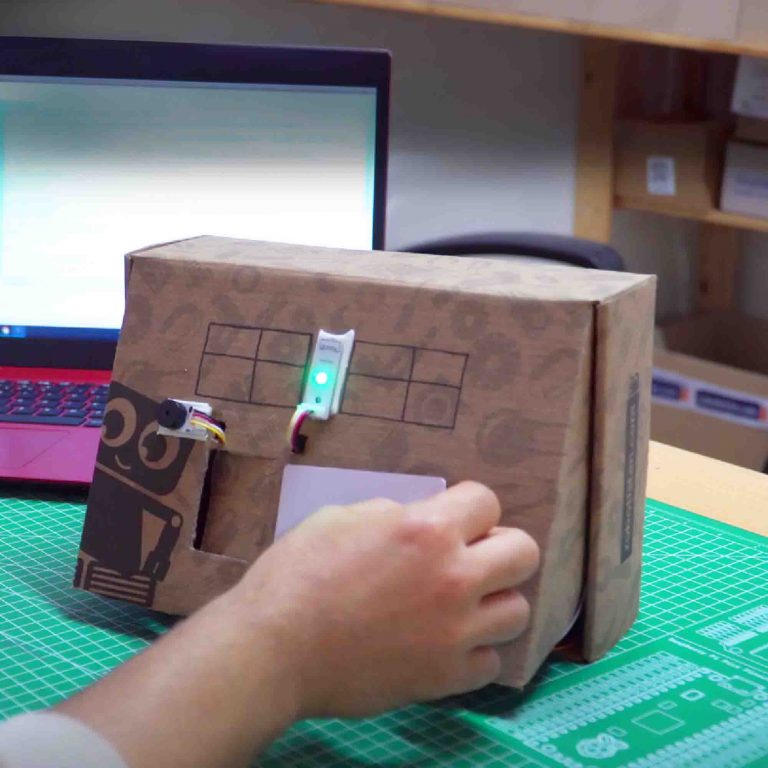
Attach double-sided foam tape on the back of the RGB LED and Buzzer and attach it on the box. Place the RC522 inside the model as in the image.

Attach the servo motor to the inside of the model with double-sided tape as a hinge in the upper left corner of the door. Attach the servo head to the door with hot glue or liquid glue.

Finally, place the Pico board and the 2-key battery box inside the model house and complete the cable connections. After making the final checks of your project, it is ready to work.

MicroBlocks Codes of the PicoBricks

You can access the Microblocks codes of the project by dragging the image to the Microblocks Run tab or click the button.

Microblocks Run Tab

MicroPython Codes of the PicoBricks

The code to be run to learn the Card ID:

from machine import Pin, SPI
from mfrc522 import MFRC522
import utime
# define libraries
sck = Pin(18, Pin.OUT)
mosi = Pin(19, Pin.OUT)
miso = Pin(16, Pin.OUT)
sda = Pin(17, Pin.OUT)
rst = Pin(15, Pin.OUT)
spi = SPI(0, baudrate=100000, polarity=0, phase=0, sck=sck, mosi=mosi, miso=miso)
rdr = MFRC522(spi, sda, rst)
# define MFRC522 pins
while True:
    (stat, tag_type) = rdr.request(rdr.REQIDL)
    if stat == rdr.OK:
        (stat, raw_uid) = rdr.anticoll()
        if stat == rdr.OK:
            uid = ("0x%02x%02x%02x%02x" % (raw_uid[0], raw_uid[1], raw_uid[2], raw_uid[3]))
            print(uid)
            utime.sleep(1)
            # read the card and give the serial number of the card

Project code:
from machine import I2C, Pin, SPI, PWM
from mfrc522 import MFRC522
from ws2812 import NeoPixel
from utime import sleep

servo = PWM(Pin(21))
servo.freq(50)
servo.duty_u16(1350)  # servo set 0 angle 8200 for 180.
buzzer = PWM(Pin(20, Pin.OUT))
buzzer.freq(440)
neo = NeoPixel(6, n=1, brightness=0.3, autowrite=False)
RED = (255, 0, 0)
GREEN = (0, 255, 0)
BLACK = (0, 0, 0)

sck = Pin(18, Pin.OUT)
mosi = Pin(19, Pin.OUT)
miso = Pin(16, Pin.OUT)
sda = Pin(17, Pin.OUT)
rst = Pin(15, Pin.OUT)
spi = SPI(0, baudrate=100000, polarity=0, phase=0, sck=sck, mosi=mosi, miso=miso)

homeowner = "0x734762a3"
rdr = MFRC522(spi, sda, rst)

while True:
    (stat, tag_type) = rdr.request(rdr.REQIDL)
    if stat == rdr.OK:
        (stat, raw_uid) = rdr.anticoll()
        if stat == rdr.OK:
            buzzer.duty_u16(3000)
            sleep(0.05)
            buzzer.duty_u16(0)
            uid = ("0x%02x%02x%02x%02x" % (raw_uid[0], raw_uid[1], raw_uid[2], raw_uid[3]))
            print(uid)
            sleep(1)
            if uid == homeowner:
                neo.fill(GREEN)
                neo.show()
                servo.duty_u16(6000)
                sleep(3)
                servo.duty_u16(1350)
                neo.fill(BLACK)
                neo.show()
            else:
                neo.fill(RED)
                neo.show()
                sleep(3)
                neo.fill(BLACK)
                neo.show()
                servo.duty_u16(1350)
 

Arduino C Codes of the PicoBricks

The code to be run to learn the Card ID:


#include <SPI.h>
#include <MFRC522.h>
// define libraries
int RST_PIN = 26;
int SS_PIN = 17;
// define pins
MFRC522 rfid(SS_PIN, RST_PIN);

void setup() {
  Serial.begin(9600);
  SPI.begin();
  rfid.PCD_Init();
}

void loop() {
  if (!rfid.PICC_IsNewCardPresent())
    return;
  if (!rfid.PICC_ReadCardSerial())
    return;
  rfid.uid.uidByte[0];
  rfid.uid.uidByte[1];
  rfid.uid.uidByte[2];
  rfid.uid.uidByte[3];
  printid();
  rfid.PICC_HaltA();
  // Reading your ID.
}

void printid() {
  Serial.print("Your ID: ");
  for (int x = 0; x < 4; x++) {
    Serial.print(rfid.uid.uidByte[x], HEX);
    Serial.print(" ");
  }
  Serial.println("");
}

Project code:

#include <SPI.h>
#include <MFRC522.h>
#include <Servo.h>
#include <Adafruit_NeoPixel.h>
//Define libraries.
#define RST_PIN    26
#define SS_PIN     17
#define servoPin   22
#define PIN        6
#define NUMPIXELS  1
#define buzzer     20
//define pins of servo, buzzer, neopixel and rfid.
Adafruit_NeoPixel pixels(NUMPIXELS, PIN, NEO_GRB + NEO_KHZ800);
Servo motor;
MFRC522 rfid(SS_PIN, RST_PIN);
byte ID[4] = {"Write your own ID."}; // Replace with your actual ID
void setup() {
  pixels.begin();
  motor.attach(servoPin);
  Serial.begin(9600);
  SPI.begin();
  rfid.PCD_Init();
  pinMode(buzzer, OUTPUT);
}

void loop() {
  pixels.clear();
  if ( !rfid.PICC_IsNewCardPresent())
    return;
  if ( !rfid.PICC_ReadCardSerial())
    return;
  if (rfid.uid.uidByte[0] == ID[0] && 
      rfid.uid.uidByte[1] == ID[1] && 
      rfid.uid.uidByte[2] == ID[2] && 
      rfid.uid.uidByte[3] == ID[3]) {
    Serial.println("Door Opened.");
    printid();
    tone(buzzer,523);
    delay(200);
    noTone(buzzer);
    delay(100);
    tone(buzzer,523);
    delay(200);
    noTone(buzzer);
    pixels.setPixelColor(0, pixels.Color(0, 250, 0));
    delay(200);
    pixels.show();
    pixels.setPixelColor(0, pixels.Color(0, 0, 0));
    delay(200);
    pixels.show();
    motor.write(180);
    delay(2000);
    motor.write(0);
    delay(1000);
    //RGB LED turns green and the door opens thanks to the servo motor if the correct card is read to the sensor.
  } else {
    Serial.println("Unknown Card.");
    printid();
    tone(buzzer,494);
    delay(200);
    noTone(buzzer);
    delay(100);
    tone(buzzer,494);
    delay(200);
    noTone(buzzer);
    pixels.setPixelColor(0, pixels.Color(250, 0, 0));
    delay(100);
    pixels.show();
    pixels.setPixelColor(0, pixels.Color(0, 0, 0));
    delay(100);
    pixels.show();
    //RGB LED turns red and the door does not open if the wrong card is read to the sensor.
  }
  rfid.PICC_HaltA();
}

void printid() {
  Serial.print("ID Number: ");
  for (int x = 0; x < 4; x++) {
    Serial.print(rfid.uid.uidByte[x], HEX);
    Serial.print(" ");
  }
  Serial.println("");
}

GitHub Project Page
Prev Post
Next Post

Thanks for subscribing!

This email has been registered!

Shop the look
Choose Options

Edit Option

Have Questions?

Back In Stock Notification

Compare

Product SKUDescription Collection Availability Product Type Other Details

Terms & Conditions

What is Lorem Ipsum? Lorem Ipsum is simply dummy text of the printing and typesetting industry. Lorem Ipsum has been the industry's standard dummy text ever since the 1500s, when an unknown printer took a galley of type and scrambled it to make a type specimen book. It has survived not only five centuries, but also the leap into electronic typesetting, remaining essentially unchanged. It was popularised in the 1960s with the release of Letraset sheets containing Lorem Ipsum passages, and more recently with desktop publishing software like Aldus PageMaker including versions of Lorem Ipsum. Why do we use it? It is a long established fact that a reader will be distracted by the readable content of a page when looking at its layout. The point of using Lorem Ipsum is that it has a more-or-less normal distribution of letters, as opposed to using 'Content here, content here', making it look like readable English. Many desktop publishing packages and web page editors now use Lorem Ipsum as their default model text, and a search for 'lorem ipsum' will uncover many web sites still in their infancy. Various versions have evolved over the years, sometimes by accident, sometimes on purpose (injected humour and the like).
this is just a warning
Login
Shopping Cart
0 items