


#19 Hungry Piggy Bank Project With PicoBricks
Ultrasonic sensors send out sound waves at a frequency that our ears cannot detect and produce distance information by calculating the return time of the reflected sound waves. We, the programmers, develop projects by making sense of the measured distance and the changes in distance. Parking sensors in the front and back of the cars are the places where ultrasonic sensors are most common in daily life. Do you know the creature that finds its way in nature with this method? Because bats are blind, they find their way through the reflections of the sounds they make.
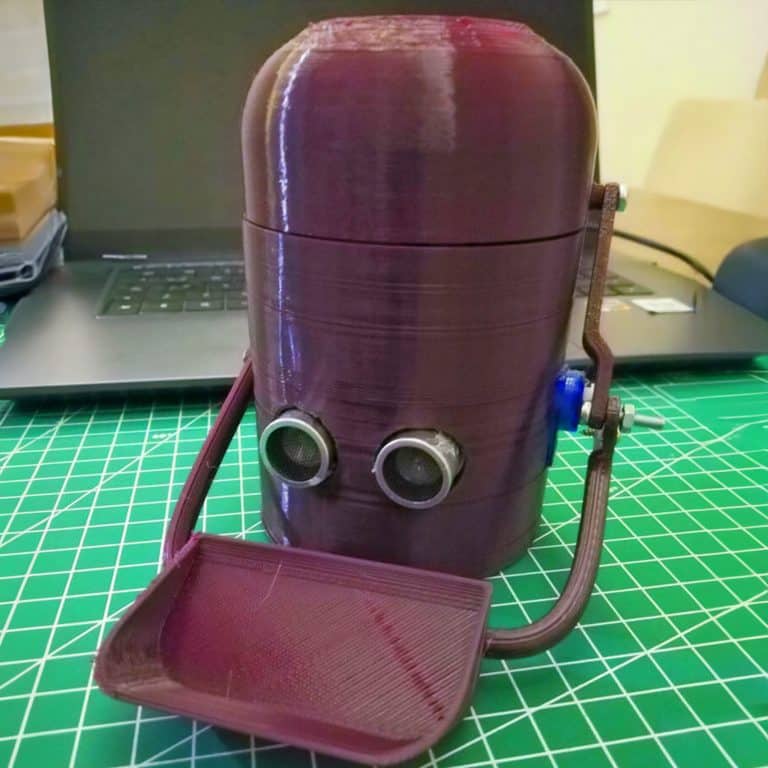
Many of us like to save money. It is a very nice feeling that the money we save little by little is useful when needed. In this project, you will make yourself a very enjoyable and cute piggy bank. You will use the servo motor and ultrasonic distance sensor while making the piggy bank.
Details and Algorithm
1X PicoBricks
1X HC-SR04 Ultrasonic Sensor
1X Servo Motor
Jumper Cables
Easy Connection Cables
Wiring Diagram

You can access the original files and construction stages of the project by clicking here. Unlike the project in this link, we will use the HC-SR04 ultrasonic distance sensor. You can download the updated 3D drawing files according to the HC-SR04 ultrasonic distance sensor from this link and get 3D printing.
1: Fix the plastic apparatus of the servo motor to the piggy bank arm with 2 screws.

2: Fix the second part of the piggy bank arm with the M3 screw and nut to the first part where the hopper is.
3: Pass the servo motor cable and place it in its slot.


4: Place the servo motor and its housing on the body of the piggy bank. You can use hot glue here.
5: Place the ultrasonic distance sensor in the piggy bank body and fix it with hot glue.


6: Attach the piggy bank arm to the servo motor and fix it to the top cover with M3 screws.
7: Fix the piggy bank arm to the body with M2 screw.


8: Plug the cables of the servo motor and ultrasonic distance sensor and connect the power cables.
9: According to the circuit diagram, connect the cables of the servo motor and ultrasonic distance sensor to the pico.


10: Plug Pico’s USB cable and reassemble the cables and attach the bottom cover. That is all.

MicroBlocks Codes of the PicoBricks

You can access the Microblocks codes of the project by dragging the image to the Microblocks Run tab or click the button.
MicroPython Codes of the PicoBricks
from machine import Pin, PWM
import utime
#define the libraries

servo=PWM(Pin(21,Pin.OUT))
trigger = Pin(15, Pin.OUT)
echo = Pin(14, Pin.IN)
#define the input and output pins

servo.freq(50)
servo.duty_u16(6750)

def getDistance():
   trigger.low()
   utime.sleep_us(2)
   trigger.high()
   utime.sleep_us(5)
   trigger.low()
   while echo.value() == 0:
       signaloff = utime.ticks_us()
   while echo.value() == 1:
       signalon = utime.ticks_us()
   timepassed = signalon - signaloff
   distance = (timepassed * 0.0343) / 2
   print("The distance from object is ",distance,"cm")
   return distance
#calculate distance
while True:
    utime.sleep(0.01)
    if int(getDistance())<=5:  #if the distance variable is less than 5
        servo.duty_u16(4010)
        utime.sleep(1)  #wait
    else:
        servo.duty_u16(6750)
Arduino C Codes of the PicoBricks
#include <Servo.h>
#define trigPin 15
#define echoPin 14
//define the libraries
Servo servo;
void setup() {
  Serial.begin (9600);
  pinMode(trigPin, OUTPUT);
  pinMode(echoPin, INPUT);
  //define the input and output pins
  servo.attach(21); //define the servo pin
}
void loop() {
  long duration, distance;
  digitalWrite(trigPin, LOW);
  delayMicroseconds(2);
  digitalWrite(trigPin, HIGH);
  delayMicroseconds(10);
  digitalWrite(trigPin, LOW);
  duration = pulseIn(echoPin, HIGH);
  distance = (duration/2) / 29.1;
  //calculate distance
  if (distance < 5) {    //if the distance variable is less than 5
    Serial.print(distance);
    Serial.println(" cm");
    servo.write(179);
  }
  else if (distance>5) {   // if the distance variable is greater than 5
    Serial.print(distance);
    Serial.println(" cm");
    servo.write(100);
  }
}
