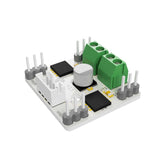
Music Project
Mozart, the iconic composer of the classical period, still continues to impress musicians and fans worldwide. In this project, we’ll explore how to recreate one of Mozart’s famous compositions using the PicoBricks platform. PicoBricks is the perfect choice for music enthusiasts and tech lovers. Our project focuses on recreating Mozart’s masterpiece using PicoBricks. We’ve transformed a chosen piece into a cute little snippet, turning it into a captivating music experience. With just a few lines of code, a bell, and a bit of creativity, we can bring Mozart’s music to life in a completely new way.
Details and Algorithm
So, first things first, we gotta set up some constants for our project. We’ll give a pin the name BUZZER_PIN, and we’ll define frequencies for different music notes like A5, B5, C5, D5, E5, and G5 as NOTE_A5, NOTE_B5, NOTE_C5, NOTE_D5, NOTE_E5, and NOTE_G5, respectively.
Next up, we’re gonna make an array called mozartSongMelody, which will hold all the notes in our melody. We’ll also make another array called mozartTempo to set how long each note should play. In the setup function, we’ll make sure BUZZER_PIN is set as an output so we can actually hear the sound.
Now, let’s get to the fun part: the loop function. We’ll use the sizeof function to figure out how many notes are in our melody. Then, we’ll go through each note in the mozartTempo array.
Inside the loop, we’ll calculate how long each note should play based on the tempo. Using that duration, we’ll use the tone function to play the note on the buzzer. We’ll also calculate a pause duration between notes to give it some rhythm and musicality. Once a note’s done playing, we’ll use noTone to stop the sound.
And that’s all there is to it! This algorithm and code let you play a beautiful Mozart melody using a buzzer. With PicoBricks, MicroPython, and Arduino, you can try out different melodies and make your own melody projects. So go ahead and dive into these simple but super fun melody projects and explore the world of sound & sound project!
Components
1xPicoBricks
Wiring Diagram

MicroBlocks Codes of The PicoBricks

MicroPython Codes of the PicoBricks
from utime import sleep
import time
from machine import Pin, I2C, PWM

tones = {
"B0": 31,
"C1": 33,
"CS1": 35,
... # (for brevity, other tones can be added here)
"DS8": 4978
}

song = ["A5","B5","C5", "B5", "A5", "A5", "E5", "E5", "D5","C5","B5","A5","G5","G5","P"]
buzzer = PWM(Pin(20))
buzzer.duty_u16(0)

def playtone(frequency):
    buzzer.duty_u16(3000)
    buzzer.freq(frequency)

def bequiet():
    buzzer.duty_u16(0)

def playsong():
    playtone(tones["A5"])
    sleep(0.2)
    ... # (for brevity, other song notes can be added here)
    bequiet()
    playtone(tones["E5"])
    sleep(2)

    bequiet()

playsong()
Arduino C Codes of the PicoBricks
#define BUZZER_PIN 20
#define NOTE_A5 880
#define NOTE_B5 988
#define NOTE_C5 523
#define NOTE_D5 587
#define NOTE_E5 659
#define NOTE_G5 784

const int mozartSongMelody[] = {
  NOTE_A5, NOTE_B5, NOTE_C5, NOTE_B5, NOTE_A5, NOTE_A5, NOTE_E5,
  NOTE_E5,NOTE_D5,NOTE_C5,NOTE_B5,NOTE_A5,NOTE_G5,NOTE_G5,0,
};
const int mozartTempo[] = {
  2, 2, 2, 2, 8, 8, 4,
  4, 6, 2, 8, 4, 4, 4,
  2, 4, 4, 4, 4, 2, 2,
  2, 2,
};

void setup() {
  pinMode(BUZZER_PIN,OUTPUT);
}

void loop() {
  int size = sizeof(mozartTempo)/sizeof(int); // Get the number of notes in the melody
  for (int note = 0; note < size; note++) {
    int duration = 1000/mozartTempo[note];
    tone(BUZZER_PIN, mozartSongMelody[note], duration);
    int pauseBetweenNotes = duration * 1.30;
    delay(pauseBetweenNotes);
    noTone(BUZZER_PIN);
  }
}
Melody Projects
Melody projects offer PicoBricks users the opportunity to integrate music and sounds into their projects. In these melody projects, you can make your projects more captivating by using different melodies and sound effects, providing audible feedback. Melody projects underscore the significance of sound in the world of PicoBricks and take your projects to the next level!


