


#22 Digital Ruler Project With PicoBricks
03 Nov 2023
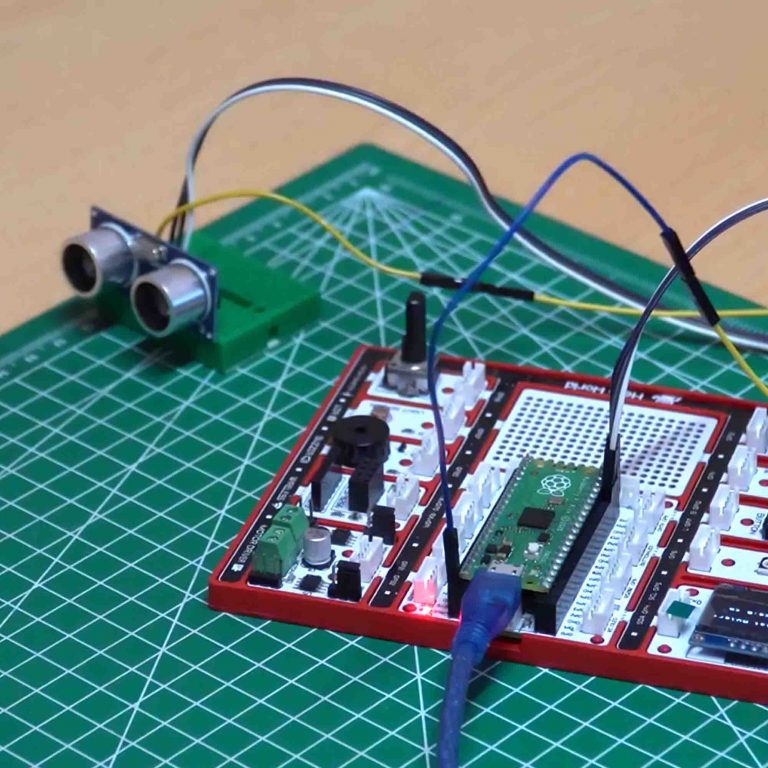
Wiring Diagram

To prepare the project, you need double-sided foam tape, a utility knife, a waste cardboard box of approximately 15x10x5 cm.
1) Cut the holes for the ultrasonic sensor, OLED screen, button LED module, buzzer, battery box to pass the cables with a utility knife.

2) Hang all the cables inside the box and attach the back of the modules to the box with double-sided foam tape. Connect the trig pin of the ultrasonic sensor to the GPIO14 pin and the echo pin to the GPIO15 pin. You should connect the VCC pin to the VBUS pin on the Picoboard.


MicroBlocks Codes of the PicoBricks

You can access the Microblocks codes of the project by dragging the image to the Microblocks Run tab or click the button.
MicroPython Codes of the PicoBricks
from machine import Pin, PWM, I2C
from utime import sleep
from picobricks import SSD1306_I2C
import utime
#define the libraries
redLed=Pin(7,Pin.OUT)
button=Pin(10,Pin.IN,Pin.PULL_DOWN)
buzzer=PWM(Pin(20,Pin.OUT))
buzzer.freq(392)
trigger = Pin(15, Pin.OUT)
echo = Pin(14, Pin.IN)
#define input and output pins
WIDTH  = 128
HEIGHT = 64
#OLED screen settings
sda=machine.Pin(4)
scl=machine.Pin(5)
i2c=machine.I2C(0,sda=sda, scl=scl, freq=1000000)
#initialize digital pin 4 and 5 as an OUTPUT for OLED communication
oled = SSD1306_I2C(128, 64, i2c)
measure=0
finalDistance=0

def getDistance():
   trigger.low()
   utime.sleep_us(2)
   trigger.high()
   utime.sleep_us(5)
   trigger.low()
   while echo.value() == 0:
       signaloff = utime.ticks_us()
   while echo.value() == 1:
       signalon = utime.ticks_us()
   timepassed = signalon - signaloff
   distance = (timepassed * 0.0343) / 2
   return distance
#calculate the distance
def getMeasure(pin):
    global measure
    global finalDistance
    redLed.value(1)
    for i in range(20):
        measure += getDistance()
        sleep(0.05)
    redLed.value(0)
    finalDistance = (measure/20) + 1
    oled.fill(0)
    oled.show()
    oled.text(">Digital Ruller<", 2,5)
    oled.text("Distance " + str(round(finalDistance)) +" cm", 0, 32)
    oled.show()
#print the specified distance to the specified x and y coordinates on the OLED screen
    print(finalDistance)
    buzzer.duty_u16(4000)
    sleep(0.05)
    buzzer.duty_u16(0)
    measure=0
    finalDistance=0
 #sound the buzzer
button.irq(trigger=machine.Pin.IRQ_RISING, handler=getMeasure)
Arduino C Codes of the PicoBricks
#include <Wire.h>
#include "ACROBOTIC_SSD1306.h"
#include <NewPing.h>
// define the libraries
#define TRIGGER_PIN  15
#define ECHO_PIN     14
#define MAX_DISTANCE 400

NewPing sonar(TRIGGER_PIN, ECHO_PIN, MAX_DISTANCE);

#define T_B 493

int distance = 0;
int total = 0;

void setup() {
  pinMode(7,OUTPUT);
  pinMode(20,OUTPUT);
  pinMode(10,INPUT);
  // define input and output pins
  Wire.begin();
  oled.init();
  oled.clearDisplay();


}

void loop() {

  delay(50);
  if(digitalRead(10) == 1){

    int measure=0;
    digitalWrite(7,HIGH);
    tone(20,T_B);
    delay(500);
    noTone(20);

    for (int i=0;i<20;i++){

      measure=sonar.ping_cm();
      total=total+measure;
      delay(50);
    }

    distance = total/20+6; // calculate the distance
    digitalWrite(7,LOW);

    delay(1000);
    oled.clearDisplay();
    oled.setTextXY(2,1);
    oled.putString(">Digital Ruler<");
    oled.setTextXY(5,1);
    oled.putString("Distance: ");
    oled.setTextXY(5,10);
    String string_distance=String(distance);
    oled.putString(string_distance);
    oled.setTextXY(5,12);
    oled.putString("cm"); // print the calculated distance on the OLED screen

    measure=0;
    distance=0;
    total=0;
  }
}
GitHub Project Page
