


What Is Raspberry Pi Display Oled?
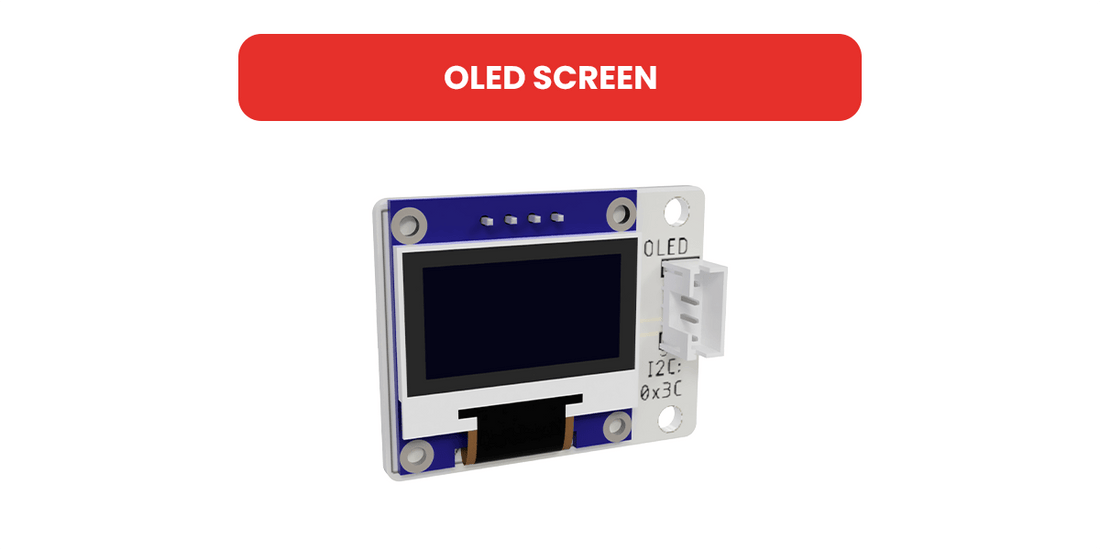
Table of Contents
What is Raspberry Pi Oled Screen?
A Raspberry Pi OLED screen is a compact display module designed specifically for use with Raspberry Pi computers. Utilizing OLED (Organic Light-Emitting Diode) technology, it offers high contrast and sharp display, often in monochrome or limited color ranges.
In more detail, these screens are popular in Raspberry Pi projects due to their low power consumption, high contrast ratios, and wide viewing angles. The sizes of these screens can vary, but they are generally small, ranging from about 0.96 inches to a few inches in diagonal. They are used for displaying text, basic graphics, and sometimes animations.
OLED screens connect to the Raspberry Pi via GPIO (General Purpose Input/Output) pins, I2C (Inter-Integrated Circuit), SPI (Serial Peripheral Interface), or even USB, depending on the specific model of the screen. This versatility makes them suitable for a wide range of applications, from simple readouts like system status or sensor data to more complex interfaces in portable projects.
Their integration often requires some programming, typically in Python, to control what is displayed. There's a variety of libraries and tools available in the Raspberry Pi community.
How to Connect Oled Screen to Raspberry Pi?
Now I will tell you step by step how to connect your display to different Raspberry Pi.
Alarm Clock Project to Understand How OLED Display Works:Raspberry Pi Pico
Hardware Requirements:
- Raspberry Pi Pico: A microcontroller board.
- OLED Display: Typically, these are 0.96-inch screens with either I2C or SPI interface. For this example, we'll assume an I2C interface.
- Jumper Wires: To make connections between the Pico and the OLED display.
- Breadboard (optional): For easier and solder-free connections.
Hardware Connections:
- Identify Pins on OLED Display: Commonly, an I2C OLED display will have four pins: GND (Ground), VCC (Power), SCL (Clock Line), and SDA (Data Line).
-
Connect to Raspberry Pi Pico:
- GND to GND: Connect the GND pin of the OLED to one of the ground (GND) pins on the Pico.
- VCC to 3.3V: Connect the VCC pin of the OLED to one of the 3.3V (VBUS) pins on the Pico.
- SCL to GPIO1: Connect the SCL pin of the OLED to GPIO1 on the Pico.
- SDA to GPIO0: Connect the SDA pin of the OLED to GPIO0 on the Pico.
Software Setup:
- Install Thonny IDE: If not already installed, download and install Thonny IDE, which is suitable for running and uploading Python code to the Raspberry Pi Pico.
- Connect Pico to Your Computer: Use a micro USB cable to connect the Pico to your computer.
Coding:
- Open Thonny IDE and select the correct interpreter for Raspberry Pi Pico.
-
Install Necessary Libraries: You may need to install libraries like
ssd1306andmachinefor interfacing with the OLED. This can be done through the Thonny IDE. -
Write the Code:
- Import the necessary modules.
- Initialize I2C communication.
- Create an instance of the OLED display.
- Write functions to display text or graphics.
- Run the Code: Upload and run the code on the Pico. You should see the display come to life with your chosen text or graphics.
Example Python Code:
from machine import Pin, I2C
import ssd1306

# Initialize I2C
i2c = I2C(0, scl=Pin(1), sda=Pin(0))

# Initialize OLED Display
oled = ssd1306.SSD1306_I2C(128, 64, i2c)

# Clear the display
oled.fill(0)

# Add some text
oled.text('Hello, Pico!', 0, 0)
oled.show()

Raspberry Pi 3
Hardware Requirements:
- Raspberry Pi 3: A microcomputer with GPIO pins.
- OLED Display: Commonly, a 0.96-inch I2C interface screen.
- Jumper Wires: To connect the display to the Pi.
- Breadboard (optional): Facilitates easier connections.
Hardware Connections:
- Identify OLED Pins: Typical I2C OLED displays have GND, VCC, SCL, and SDA.
-
Raspberry Pi 3 GPIO Pins:
- 3.3V Power (Pin 1 or 17): Powers the OLED.
- Ground (Pin 6, 9, 14, 20, or 25): Ground connection.
- SCL (GPIO 3, Pin 5): Serial Clock for I2C.
- SDA (GPIO 2, Pin 3): Serial Data for I2C.
-
Connections:
- GND to GND: Connect the OLED's GND to one of the Pi's ground pins.
- VCC to 3.3V: Connect the OLED's VCC to the Pi's 3.3V pin.
- SCL to SCL (GPIO 3): Connect the OLED's SCL to GPIO 3.
- SDA to SDA (GPIO 2): Connect the OLED's SDA to GPIO 2.
Software Setup:
-
Enable I2C on Raspberry Pi:
- Open Terminal.
- Run
sudo raspi-config. - Navigate to
Interfacing Options>I2Cand enable it. - Reboot your Pi.
-
Install Necessary Libraries:
- Open Terminal.
- Update your package list:
sudo apt-get update. - Install I2C tools:
sudo apt-get install -y i2c-tools. - Install Python libraries:
sudo apt-get install -y python-smbus python3-smbus python-dev python3-dev. - Install Python OLED library (like
adafruit-circuitpython-ssd1306).
Coding with Python:
-
Write Python Script:
- Import necessary modules (
board,busio,adafruit_ssd1306). - Initialize I2C and OLED display.
- Create a function to display text or graphics.
- Run the script to display content on the OLED.
- Import necessary modules (
- Example Code:
import board
import busio
import adafruit_ssd1306

# Create the I2C interface.
i2c = busio.I2C(board.SCL, board.SDA)

# Create the SSD1306 OLED class.
disp = adafruit_ssd1306.SSD1306_I2C(128, 32, i2c)

# Clear display.
disp.fill(0)
disp.show()

# Display text.
disp.text('Hello, Pi 3!', 0, 0)
disp.show()

Raspberry Pi 4
Hardware Requirements:
- Raspberry Pi 4: A microcomputer with GPIO pins.
- OLED Display: A typical choice is a 0.96-inch screen with an I2C interface.
- Jumper Wires: For connecting the display to the Pi.
- Breadboard (optional): Useful for easier and more flexible connections.
Hardware Connections:
- Identify OLED Pins: Standard I2C OLED displays come with four pins: GND, VCC, SCL, and SDA.
-
Raspberry Pi 4 GPIO Pins:
- 3.3V Power (Pin 1 or 17): To power the OLED.
- Ground (Pin 6, 9, 14, 20, or 25): For ground connection.
- SCL (GPIO 3, Pin 5): Serial Clock for I2C communication.
- SDA (GPIO 2, Pin 3): Serial Data for I2C communication.
-
Connecting Pins:
- GND to GND: Connect the GND pin of the OLED to a ground pin on the Pi.
- VCC to 3.3V: Connect the VCC pin of the OLED to a 3.3V pin on the Pi.
- SCL to SCL (GPIO 3): Connect the SCL pin of the OLED to GPIO 3 on the Pi.
- SDA to SDA (GPIO 2): Connect the SDA pin of the OLED to GPIO 2 on the Pi.
Software Setup:
-
Enable I2C on Raspberry Pi 4:
- Open the Terminal.
- Run
sudo raspi-config. - Navigate to
Interfacing Options>I2Cand enable it. - Reboot your Pi.
-
Install Necessary Libraries:
- Update packages:
sudo apt-get update. - Install I2C tools:
sudo apt-get install -y i2c-tools. - Install Python libraries for OLED (like
adafruit-circuitpython-ssd1306).
- Update packages:
Coding with Python:
-
Writing the Code:
- Import required modules (
board,busio,adafruit_ssd1306). - Initialize I2C and the OLED display.
- Create functions to display text or graphics.
- Execute the script to display your content on the OLED.
- Import required modules (
- Example Python Script:
import board
import busio
import adafruit_ssd1306

# Create the I2C interface.
i2c = busio.I2C(board.SCL, board.SDA)

# Create the SSD1306 OLED class.
disp = adafruit_ssd1306.SSD1306_I2C(128, 32, i2c)

# Clear the display.
disp.fill(0)
disp.show()

# Display text.
disp.text('Hello, Pi 4!', 0, 0)
disp.show()

Raspberry Pi Display Comparison: OLED vs LCD
| Feature | OLED | LCD |
|---|---|---|
| Display Technology | Organic Light-Emitting Diode | Liquid Crystal Display |
| Contrast Ratio | Higher (True blacks) | Lower compared to OLED |
| Color Reproduction | More vibrant colors | Less vibrant compared to OLED |
| Viewing Angles | Wider | Narrower compared to OLED |
| Power Consumption | Generally lower (depends on content displayed) | Consistent, regardless of content |
| Lifespan | Can be shorter due to organic material degradation | Generally longer |
| Price | More expensive | Less expensive |
| Applications | Suitable for high contrast and rich color displays | Better for static image display with less concern for contrast |
If you want to experience the OLED screen on PicoBricks simulator, you can click here!
