Otto Tank Project

Hello friends! Do you want to control a remote control robot? Just tap a few buttons to go forward, go back, turn right and left!
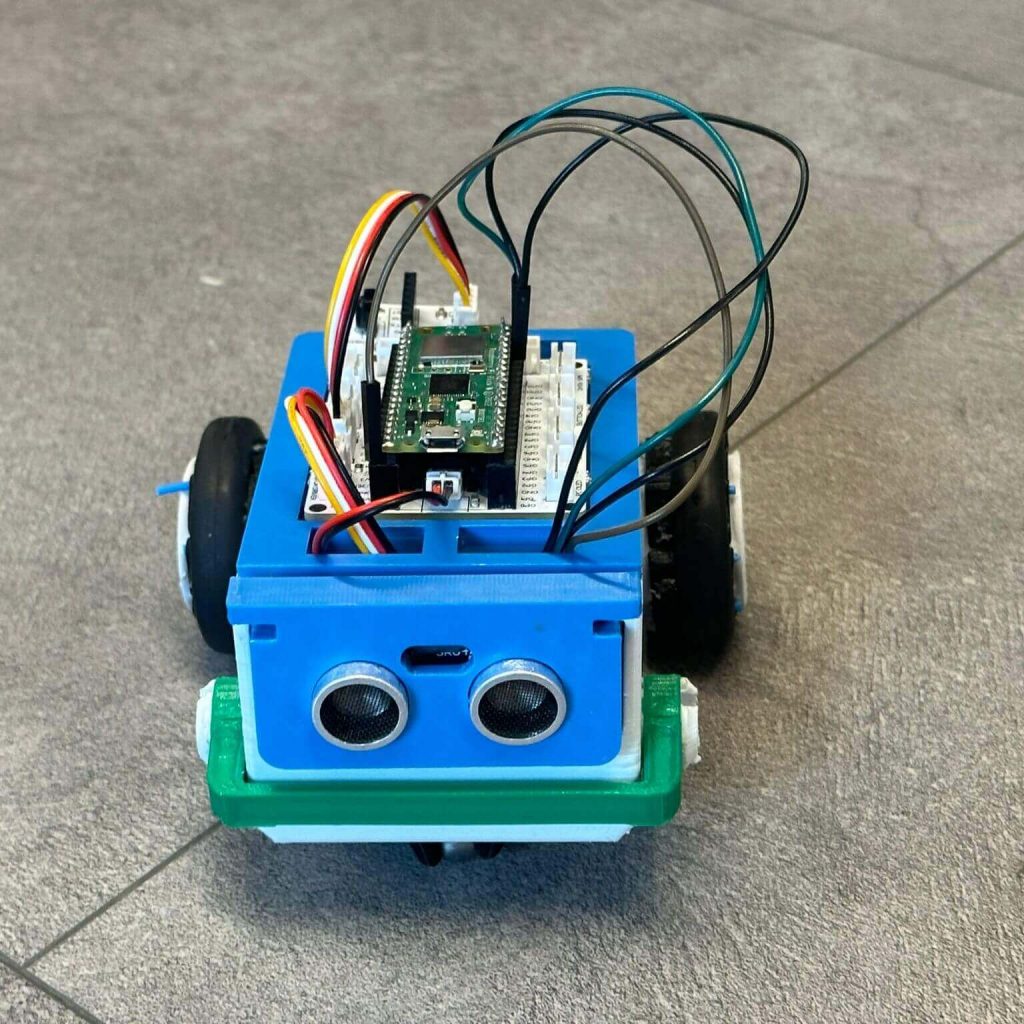
But the most interesting thing about this robot is its ability to protect itself! Thanks to the ultrasonic sensor on it, it scans its surroundings and stops automatically when it encounters an obstacle. All you have to do is use the remote control and direct your robot.
If you don’t know much about technology, don’t worry! This robot is designed to be easy for anyone to use. It can be a great source of entertainment for both children and adults.
Are you ready to control your robot and explore an exciting maze full of obstacles? Then join us to start this technological adventure!
This remote control robot project can be a great way to explore and learn basic technology and engineering topics. It can also provide a foundation for advanced projects for people interested in science and technology.
1X PicoBricks
1XHC-SR04 Ultrasonic Sensor
2XDC Motor
Connecting Cables
Batteries
Wiring Diagram

You can make the remote control robot toy by following the steps in the video below.
MicroBlocks Codes of the PicoBricks

MicroPython Codes of the PicoBricks
from time import sleep
from machine import Pin
from machine import PWM
import utime
from picobricks import NEC_16
from picobricks import IR_RX
from machine import ADC


trigger = Pin(15, Pin.OUT)
echo = Pin(14, Pin.IN)


def getDistance():
   trigger.low()
   utime.sleep_us(2)
   trigger.high()
   utime.sleep_us(5)
   trigger.low()
   while echo.value() == 0:
      signaloff = utime.ticks_us()
   while echo.value() == 1:
      signalon = utime.ticks_us()
   timepassed = signalon – signaloff
   distance = (timepassed * 0.0343) / 2
   print(“The distance from object is “,distance,”cm”)
   return distance


def ir_callback(data, addr, ctrl):
    global ir_data
    global ir_addr, data_rcvd
    if data > 0:
        ir_data = data
        ir_addr = addr
        print(‘Data {:02x} Addr {:04x}’.format(data, addr))
        data_rcvd = True
ir = NEC_16(Pin(0, Pin.IN), ir_callback)
ir_data = 0
data_rcvd = False


motor_1 = PWM(Pin(21))
motor_1.duty_u16(0)
motor_2 = PWM(Pin(22))
motor_2.duty_u16(0)


def left():
    global distance
    motor_1.duty_u16(50 * 650)
    motor_2.duty_u16(0 * 650)


def right():
    global distance
    motor_1.duty_u16(0 * 650)
    motor_2.duty_u16(50 * 650)


def stop():
    global distance
    motor_1.duty_u16(0 * 650)
    motor_2.duty_u16(0 * 650)


def forward():
    global distance
    motor_1.duty_u16(50 * 650)
    motor_2.duty_u16(50 * 650)


while True:
    distance = getDistance()
    if distance <= (10):
        stop()
    if data_rcvd == True:
        data_rcvd = False
        if ir_data == IR_RX.number_left:
            left()
        if ir_data == IR_RX.number_right:
            right()
        if ir_data == IR_RX.number_up:
            forward()
        if ir_data == IR_RX.number_ok:
            stop()
PicoBricks IDE Codes of the PicoBricks

Arduino of the Project
#include <IRremote.h>
#include <Wire.h>
#include "ACROBOTIC_SSD1306.h"
#define IR_RECEIVE_PIN 0
#define trigPin 15
#define echoPin 14
int a = 0;
long duration, distance;
void setup() {
  //define dht sensor and Oled screen
  Serial.begin(115200);
  Wire.begin();
  oled.init();
  oled.clearDisplay();
  pinMode(IR_RECEIVE_PIN, INPUT);
  IrReceiver.begin(IR_RECEIVE_PIN, ENABLE_LED_FEEDBACK);
  pinMode(trigPin, OUTPUT);
  pinMode(echoPin, INPUT);
}
void loop() {
  if (IrReceiver.decode()) {
    a = (IrReceiver.decodedIRData.decodedRawData);
    Serial.println(a);
    IrReceiver.resume();
  }
  digitalWrite(trigPin, LOW);
  delayMicroseconds(2);
  digitalWrite(trigPin, HIGH);
  delayMicroseconds(10);
  digitalWrite(trigPin, LOW);
  duration = pulseIn(echoPin, HIGH);
  distance = (duration / 2) / 29.1;
  if (distance <= 10)
  {
    stop();
  }
  if (a == -1520763136) {
    left();
  }
  if (a == -150405376) {
    right();
  }
  if (a == -417792256) {
    forward();
  }
  if (a == -484638976) {
    stop();
  }
}
void stop()
{
  digitalWrite(21, LOW);
  digitalWrite(22, LOW);
}
void left()
{
  digitalWrite(21, HIGH);
  digitalWrite(22, LOW);
}
void right()
{
  digitalWrite(21, LOW);
  digitalWrite(22, HIGH);
}
void forward()
{
  digitalWrite(21, HIGH);
  digitalWrite(22, HIGH);
}