


#8 My Timer Project With PicoBricks
Measuring time is a simple but important task that we do in our daily lives without realizing it. A surgeon in surgery, a business person trying to catch up with a meeting, an athlete trying to win, a student trying to finish an exam or a chess match… Smart wrist watches, phones and even professional chronometers are used to measure time. Time is a variable that should be used very accurately in electronic systems. For example, a washing machine; how long the drum will rotate clockwise, how much counterclockwise, how many seconds water must flow in order to dissolve the detergent are tasks done by measuring time. To develop projects where time is of the essence, you need to know how to use it.
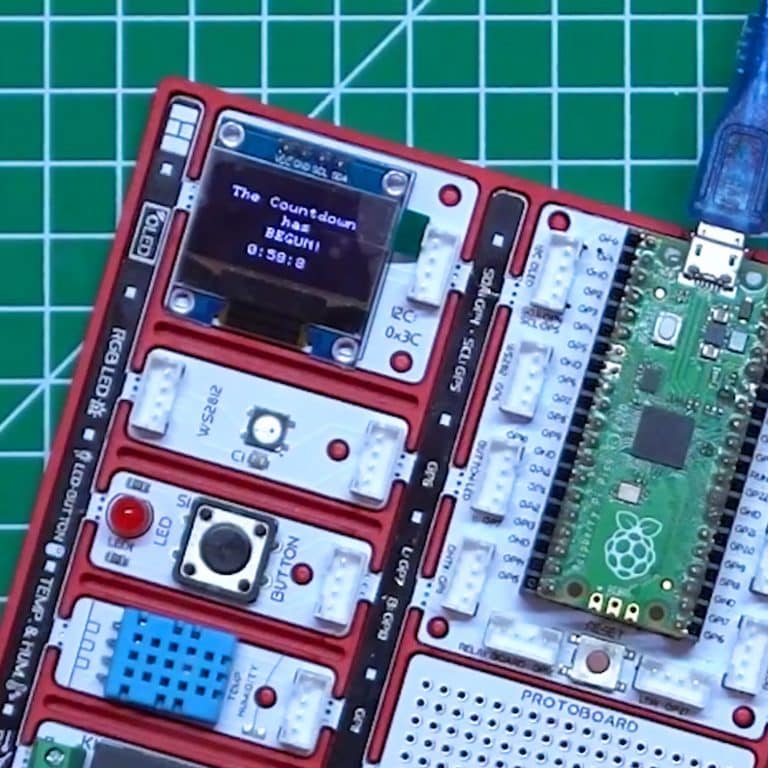
In this project, you will make your own time measuring device using PicoBricks, OLED display, button and potentiometer modules. A Timer…
Wiring Diagram

MicroBlocks Codes of the PicoBricks

You can access the Microblocks codes of the project by dragging the image to the Microblocks Run tab or click the button:
MicroPython Codes of the PicoBricks
from machine import Pin, I2C, ADC, Timer #to access the hardware picobricks
from picobricks import SSD1306_I2C #oled library
import utime #time library

WIDTH  = 128
HEIGHT = 64
#define the width and height values

sda = machine.Pin(4)
scl = machine.Pin(5)
#we define sda and scl pins for inter-path communication
i2c = machine.I2C(0, sda=sda, scl=scl, freq=1000000) #determine the frequency values

oled = SSD1306_I2C(128, 64, i2c)
pot = ADC(Pin(26))
button = Pin(10, Pin.IN, Pin.PULL_DOWN)
#define our input and output pins

oled.fill(0)
oled.show()
#Show on OLED

time = Timer()
time2 = Timer()
time3 = Timer()
#define timers

def minute(timer):
    global setTimer
    setTimer -= 1

def second(timer):
    global sec
    sec -= 1
    if sec == -1:
        sec = 59

def msecond(timer):
    global msec
    msec -= 1
    if msec == -1:
        msec = 99
#We determine the increments of the minute-second and millisecond values.
sec = 59
msec = 99

global setTimer

while button.value() == 0:
    setTimer = int((pot.read_u16() * 60) / 65536) + 1
    oled.text("Set timer:" + str(setTimer) + " min", 0, 12)
    oled.show()
    utime.sleep(0.1)
    oled.fill(0)
    oled.show()
#If the button is not pressed, the value determined by the potentiometer is printed on the OLED screen.

setTimer -= 1

time.init(mode=Timer.PERIODIC, period=60000, callback=minute)
time2.init(mode=Timer.PERIODIC, period=1000, callback=second)
time3.init(mode=Timer.PERIODIC, period=10, callback=msecond)
#We determine the periods of minutes, seconds and milliseconds.
utime.sleep(0.2)  # wait for 0.2 second

while button.value() == 0:
    oled.text("min:" + str(setTimer), 50, 10)
    oled.text("sec:" + str(sec), 50, 20)
    oled.text("ms:" + str(msec), 50, 30)
    oled.show()
    utime.sleep(0.008)
    oled.fill(0)
    oled.show()
    if setTimer == 0 and sec == 0 and msec == 99:
        utime.sleep(0.1)
        msec = 0
        break;
#When the button is pressed, it prints the min-sec-ms values to the OLED screen in the determined x and y coordinates.

oled.text(str(setTimer), 60, 10)
oled.text(str(sec), 60, 20)
oled.text(str(msec), 60, 30)
oled.text("Time is Over!", 10, 48)
oled.show()
#Print the minutes, seconds, milliseconds and "Time is Over" values to the X and Y coordinates determi
Arduino C Codes of the PicoBricks
#include <Wire.h>
#include "ACROBOTIC_SSD1306.h"

int minute;
int second = 59;
int milisecond = 9;
int setTimer;

void setup() {
  // put your setup code here, to run once:
  pinMode(10, INPUT);
  pinMode(26, INPUT);

  Wire.begin();
  oled.init();
  oled.clearDisplay();
}

void loop() {
  // put your main code here, to run repeatedly:
  oled.setTextXY(1,2);
  oled.putString("<<My Timer>>");
  oled.setTextXY(3,1);
  oled.putString("Please use the");
  oled.setTextXY(4,1);
  oled.putString("Potantiometer");
  oled.setTextXY(5,0);
  oled.putString("to set the Timer");
  delay(3000);
  oled.clearDisplay();

  while(!(digitalRead(10) == 1))
  {
    setTimer = (analogRead(26) * 60) / 1023;
    oled.setTextXY(3,1);
    oled.putString("set to:");
    oled.setTextXY(3,8);
    oled.putString(String(setTimer));
    oled.setTextXY(3,11);
    oled.putString("min.");
  }
  oled.clearDisplay();
  oled.setTextXY(1,1);
  oled.putString("The Countdown");
  oled.setTextXY(2,3);
  oled.putString("has begin!");

  while(!(digitalRead(10) == 1))
  {
    milisecond = 9 - (millis() % 100) / 10;
    second = 59 - (millis() % 60000) / 1000;
    minute = (setTimer - 1) - ((millis() % 360000) / 60000);

    oled.setTextXY(5,3);
    oled.putString(String(minute));
    oled.setTextXY(5,8);
    oled.putString(String(second));
    oled.setTextXY(5,13);
    oled.putString(String(milisecond));
    oled.setTextXY(5,6);
    oled.putString(":");
    oled.setTextXY(5,11);
    oled.putString(":");
  }
  oled.setTextXY(5,3);
  oled.putString(String(minute));
  oled.setTextXY(5,8);
  oled.putString(String(second));
  oled.setTextXY(5,13);
  oled.putString(String(milisecond));
  oled.setTextXY(5,6);
  oled.putString(":");
  oled.setTextXY(5,11);
  oled.putString(":");
  delay(10000);

  if (minute == 0 && second == 0 && milisecond == 0){

    oled.setTextXY(5,3);
    oled.putString(String(minute));
    oled.setTextXY(5,8);
    oled.putString(String(second));
    oled.setTextXY(5,13);
    oled.putString(String(milisecond));
    oled.setTextXY(5,6);
    oled.putString(":");
    oled.setTextXY(5,11);
    oled.putString(":");
    oled.putString("-finished-");
    oled.setTextXY(7,5);
    delay(10000);
  }
}
