


Carnival Swing Ride Project
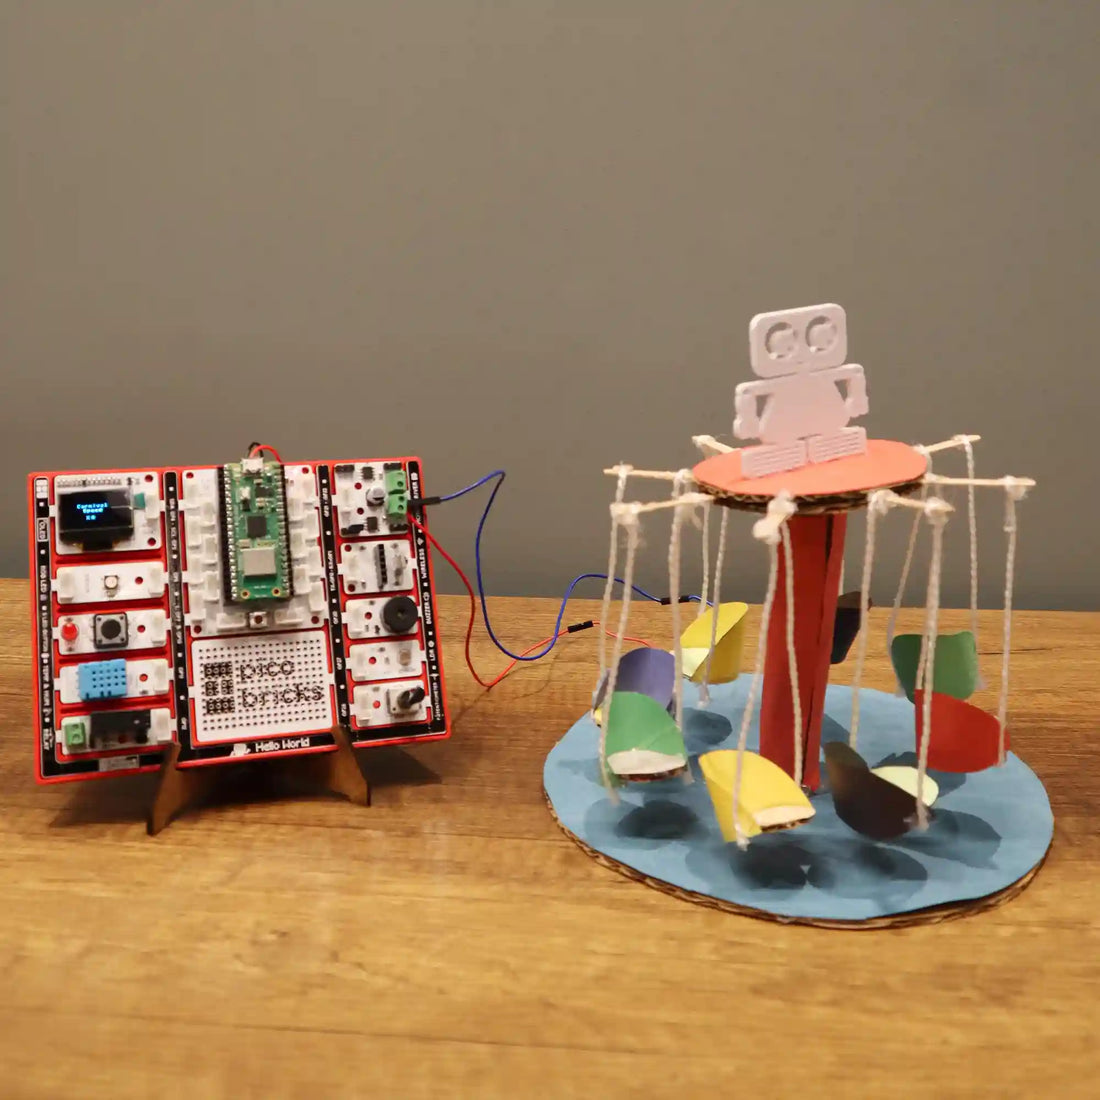
Do you remember the carnival swing ride sets that used to eagerly await us at the school gates after classes? Those swings, where a group could hop on simultaneously and enjoy the exhilarating ride, were also a common sight in amusement parks or tucked away in neighborhood corners. Chances are, you've taken a spin on one at least once. Now, we are bringing this traditional playground favorite back to life in an electronic form. Using PicoBricks, a DC motor, and a buzzer, we're inviting you to recreate this classic amusement—whether as a decorative piece, a toy, or creative project ideas tailored to your imagination. Would you like to try this project out and decide where it fits best in your world?
Details and Algorithm
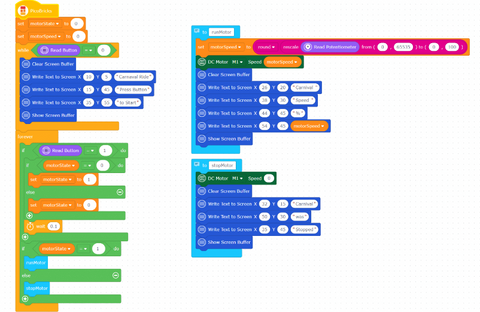
This code forms the foundation of a Raspberry Pi-supported swing carnival ride project, blending the nostalgia of traditional amusement with modern electronic control. To regulate the swing's speed, it introduces essential variables such as 'motorState' and 'motorSpeed.' The initial motor speed is set to zero as a starting point.
The code consists of two fundamental functions: 'runMotor' and 'stopMotor.' The 'runMotor' function reads the potentiometer's value, converts it into a percentage, and determines the motor's speed. Simultaneously, it displays the carnival swing's speed on an OLED screen. On the other hand, the 'stopMotor' function sets the motor speed to zero, displaying a 'Carnival Stopped' message on the screen. In essence, this code allows for the real-time adjustment of the swing's rotation speed using a potentiometer and provides immediate feedback on the screen.
Initially, the user is greeted with a message instructing them to press a button to start the project swing park. The code then waits for the user to press the button, and when pressed, it toggles the motor's state. Subsequently, based on the motor's state, either the 'runMotor' or 'stopMotor' function is invoked.
In summary, this code employs a button and a potentiometer to control the project swing park, blending a touch of nostalgia with modern electronics. It offers an engaging and interactive experience, allowing users to fine-tune the swing's speed in real-time while enjoying the charm of a classic carnival swing ride.
Components
- 1xPicoBricks
- 1xDC Motor
- Jumper Cables
- Cardboard
- Colored Papers
- 8xRope
- 1xScissors
- Caulking Gun
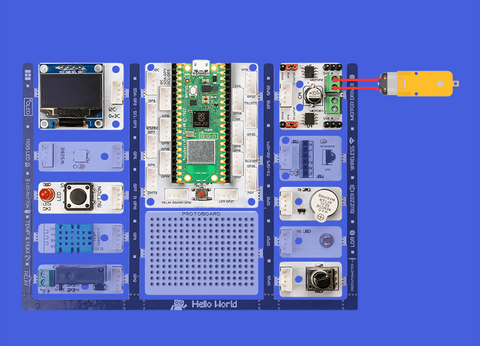
Wiring Diagram
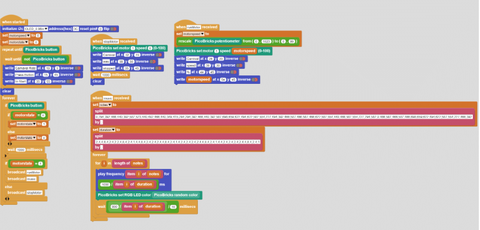
MicroBlocks Codes of PicoBricks
PicoBlockly Codes of PicoBricks
MicroPython Codes of PicoBricks
from time import sleep
import machine
from machine import Pin
from machine import I2C
from picobricks import SSD1306_I2C
import time
import math
from machine import PWM
from machine import ADC

pin_button = machine.Pin(10, machine.Pin.IN)
i2c = I2C(0, scl=Pin(5), sda=Pin(4), freq=200000)
oled = SSD1306_I2C(128, 64, i2c, addr=0x3c)
import math
pot = machine.ADC(26)
motor_1 = PWM(Pin(21))
motor_1.duty_u16(0)

def runMotor():
    global motorState, motorSpeed
    motorSpeed = round(round( pot.read_u16() - 0 ) * ( 100 - 0 ) / ( 65535 - 0 ) + 0)
    motor_1.duty_u16(motorSpeed * 650)
    oled.fill(0)
    oled.text("{}".format("Carnival "), 26, 20)
    oled.text("{}".format("Speed "), 38, 30)
    oled.text("{}".format("%"), 44, 45)
    oled.text("{}".format(motorSpeed), 54, 45)
    oled.show()

def stopMotor():
    global motorState, motorSpeed
    motor_1.duty_u16(0 * 650)
    oled.fill(0)
    oled.text("{}".format("Carnival"), 32, 15)
    oled.text("{}".format("was"), 50, 30)
    oled.text("{}".format("Stopped"), 35, 45)
    oled.show()

motorState = 0
motorSpeed = 0
while (pin_button.value()) == (0):
    oled.fill(0)
    oled.text("{}".format("Carnaval Ride"), 10, 5)
    oled.text("{}".format("Press Button"), 15, 45)
    oled.text("{}".format("to Start"), 35, 55)
    oled.show()

while True:
    if (pin_button.value()) == (1):
        if motorState == (0):
            motorState = 1
        else:
            motorState = 0
        time.sleep((0.1))
    if motorState == (1):
        runMotor()
    else:
        stopMotor()
Arduino C Codes of PicoBricks
#include
#include "ACROBOTIC_SSD1306.h"

#define BUTTON_PIN 10

const int motorPin = 21;
const int potPin = 26;

bool motorState = false;

void stopMotor() {
  analogWrite(motorPin, 0);
  //oled.clearDisplay();
  oled.setTextXY(1, 3);
  oled.putString("Carnival");
  oled.setTextXY(3, 6);
  oled.putString("was");
  oled.setTextXY(5, 4);
  oled.putString("Stopped");
}

void setup() {
  Serial.begin(9600);
  pinMode(BUTTON_PIN, INPUT);
  pinMode(motorPin, OUTPUT);
  Wire.begin();
  oled.init();
  oled.clearDisplay();
  oled.setTextXY(1, 4);
  oled.putString("Carnival");
  oled.setTextXY(2, 6);
  oled.putString("Ride");
  oled.setTextXY(5,2);
  oled.putString("Press Button");
  oled.setTextXY(6,3);
  oled.putString("to Start");
}

void loop() {
  if (digitalRead(BUTTON_PIN) == HIGH) {
    motorState = true;
    delay(100);
    oled.clearDisplay();
  }

  while(motorState == true) {
    Serial.println(motorState);
    int motorSpeed = map(analogRead(potPin), 0, 1023, 0, 99);
    analogWrite(motorPin, motorSpeed * 2.5);
    oled.setTextXY(1, 4);
    oled.putString("Carnival");
    oled.setTextXY(3, 5);
    oled.putString("Speed");
    oled.setTextXY(5, 5);
    oled.putString("%");
    oled.setTextXY(5, 7);
    oled.putString(String(motorSpeed));

    if (digitalRead(BUTTON_PIN) == HIGH) {
      motorState = false;
      oled.clearDisplay();
      stopMotor();
      delay(300);
    }
 }

}
With these creative project ideas that you can easily do on your own with PicoBricks, seize the opportunity to improve yourself a little more in the field of coding every day!
