#14 IoT Control Panel With micro:bit
With advancing technology, electronic devices can now communicate with each other. For example, we can control our electronic home appliances such as washing machines, dishwashers, ovens, etc., from our phones. The ability of electronic devices to communicate with each other through internet networks is defined as the "Internet of Things (IoT)." Each device that communicates with others is considered an object. Thanks to the Internet of Things (IoT), we can control a device even if we are at a distant location. In this way, we can eliminate potential dangers that may occur in an environment where we are not present. By using the Internet of Things, we can control devices and also write the data we obtain from these devices to a server in the internet environment. In this way, we can instantly learn any data we want at any location, even if we are not physically present there. The ThingSpeak application we will use in this project is software that allows us to store the data we obtain from different devices on a server we create and monitor real-time changes in the data.
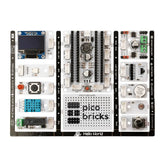
In this project, we will write the data obtained from PicoBricks modules; TEMP&HUM, PIR, LDR, and the Proximity feature in the Gesture module, to a channel created in ThingSpeak and control the changes in the values.
Connection Diagram:
You can prepare this project without making any cable connections.

Project Images:


Usage of ThingSpeak
-
Go to the https://thingspeak.com/ address.

-
Click the “Get Started For Free” button.

-
If you have a MathWorks account for ThingSpeak, you can log in by entering your email and password. If you do not have an account, you can create a new one by clicking the 'Create one' button.


-
After logging into your account, click on the 'Channels' button.

- Click the “New Channel” button.

-
Fill in the information in the window that opens as follows, and click the 'Save Channel' button.


-
We have now created the necessary channel to print the data obtained from PicoBricks modules. We will use the following 'API Keys' in the code blocks we will create in MakeCode to write the data to the channel.


